Last year I started looking at 2FA (Two Factor Authentication) solutions and came across YubiKey which is a fantastic little device. I ordered a few NEOs to play with. There are several models, I opted for the NEO since it supports the most features and has an NFC chip that Android phones can use. It’s $50 on Amazon or can be ordered direct from the Yubico Store for $55.
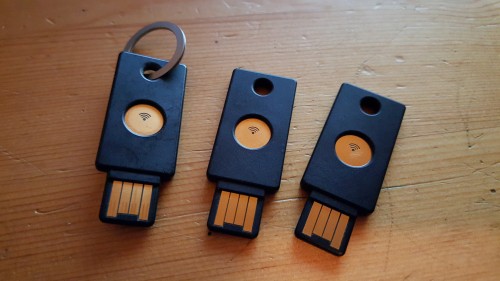
YubiKeys purposefully have firmware that can’t be overwritten. The downside is it’s impossible to upgrade them when new firmware features become available, but the benefit is it’s more secure. So far Yubico has stood behind their product and done what’s right–last year a security issue was discovered with the Yubikey NEO’s OpenPGP card applet and Yubico issued free replacements to everyone affected.
A few things I wanted to try:
- Secure a KeePass database using a YubiKey.
- Use in place of a Google Authenticator for services that support OATH-TOTP.
- Use in place of a Battle.Net Authenticator.
- Use with a service that supports FIDO-U2F (Universal Second Factor)
- Cloning a key (to have a backup)
The rest of this post is sort of a guide on some of the things I’ve experimented with.
Preliminary: Enable All NEO Modes
Open up the Yubikey NEO Manager, insert a YubiKey and hit Change Connection Mode.
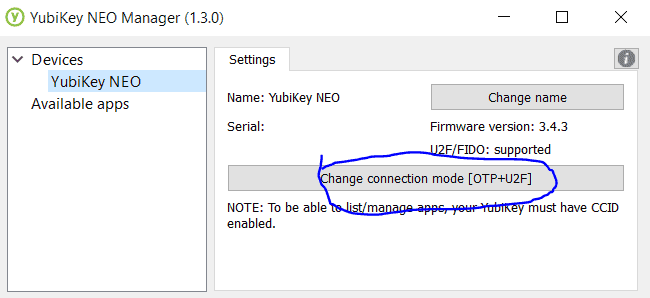
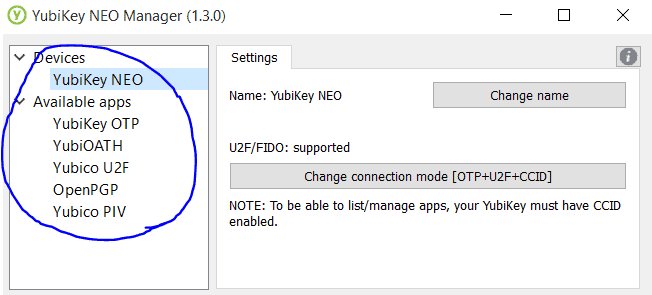
All three modes need to be checked:

And now apps are available.
Encrypting a KeePass Database
Enable Challenge/Response on the Yubikey
I followed a well-written post: Securing Keepass with a Second Factor – Kahu Security but made a few minor changes. I think some of the options I used such as variable input were not working right when the above guide was written. Below is the configuration I used when testing. If you want more details and screenshots see the Kahu Security post.
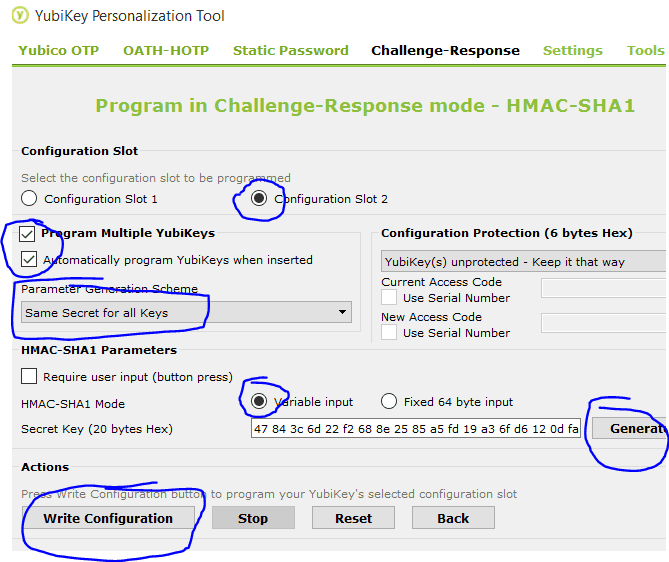
Open the YubiKey Personalization Tool and program SLOT 2. If you might use YubiCloud in the future don’t reprogram SLOT 1. There are two options, one (which I don’t want) is Yubico OTP. This will generate one time passwords based on a counter (HOTP). Since I want to use multiple YubiKeys, HOTP will not work well because the counters will get out of sync. I suggest using HMAC-SHA1 which allows a program to send a challenge that only the YubiKey would know the correct response to based on the secret.
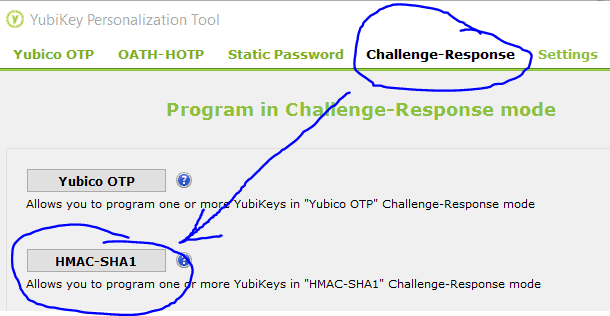
Select Slot 2, if you want to be able to unlock Keepass with multiple YubiKeys then select those options and choose “Same secret for all keys” Generate the secret key, hit “Write Configuration” Then insert any additional YubiKeys to program them all with the same secret.
Assuming KeePass 2 is already installed,
Grab the KeeChallenge plugin, install it by extracting the contents, including folders into the root of: C:\Program Files (x86)\KeePass Password Safe 2.
Download the Yubikey Personalization Tools (command line) for both 64-bit and 32-bit. Under ykpers-1.17.3-win32.zip/bin extract the .dll files to C:\Program Files (x86)\KeePass Password Safe 2\32bit overwriting any files, and do the same for 64-bit.
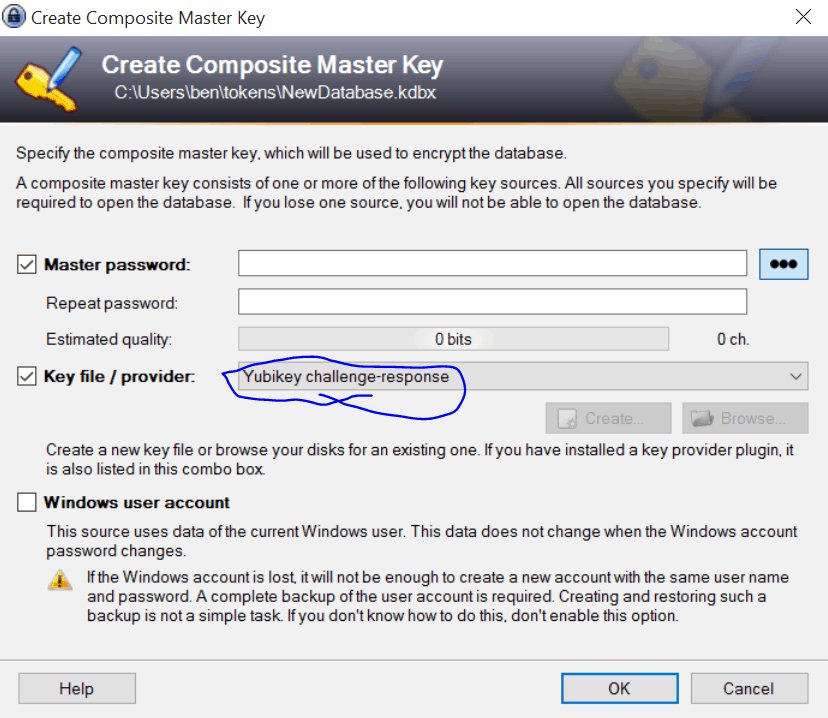
Once that’s set up create a KeePass database using YubiKey’s challenge-response as part of the composite master key.
Obviously save the secret to recover the database someplace safe in case the Yubikey(s) should fail or get lost. And once again, if you’d like more details or screenshots see the Kahu Security guide.
KeeChallenge Linux Install
Also, this is easily set up in Linux. Using Ubuntu Gnome 16.04 Beta:
sudo apt-get install keepass2
sudo apt-get install libykpers-1-1
wget --content-disposition https://sourceforge.net/projects/keechallenge/files/latest/download?source=files
unzip KeeChallenge_1.4_win.zip
sudo cp KeeChallenge_1.4_win.zip /usr/lib/keepass2/
cd /usr/lib/keepass2/
sudo unzip KeeChallenge_1.4_win.zip
(although KeeChallange doesn’t need it, I’ve found most plugins for KeePass2 on Linux need mono-complete installed or it fails to load the plugin with a plugin incompatibility error).
What Security Does YubiKey Provide for KeePass?
This method causes KeePass to encrypt the database which can only be unlocked with a response to the challenge stored in an XML file in the same location as the KeePass database. Only the YubiKey (or of course the recovery key) can provide the answer and it does so without revealing the secret which means an interception doesn’t give an attacker the ability to respond to future challenges. This challenge/response changes each time the KeePass database is modified. If an attacker were to intercept the Challenge/Response he would only be able to use that information to decrypt that particular version of the database–not future or past versions–and only if he also was able to intercept the rest of the composite key (such as the password). This isn’t foolproof of course, and there are certainly other attack vectors that this offers to no protection against, but adding challenge/response to the composite key does add another layer of security.
Caution with Synchronizing
I should note that if you’re using something like DropBox, Google Drive, Syncthing, etc. to keep the KeePass database on multiple devices in sync that both files: the KeePass KDBX file and corresponding XML file must be kept in sync. The XML file is updated with a new challenge/response for the kdbx file on each KeePass save. An older version of the xml file will not open the latest kdbx file and vice-versa. Probably the only time the files would go out of sync is if changes on one file synchronized but you lost connection before the other one was updated. It’s probably a rare event but something to be aware of and another reason to have decent, versioned backups and also have a recovery key.
Yubikey Challenge/Response with Android
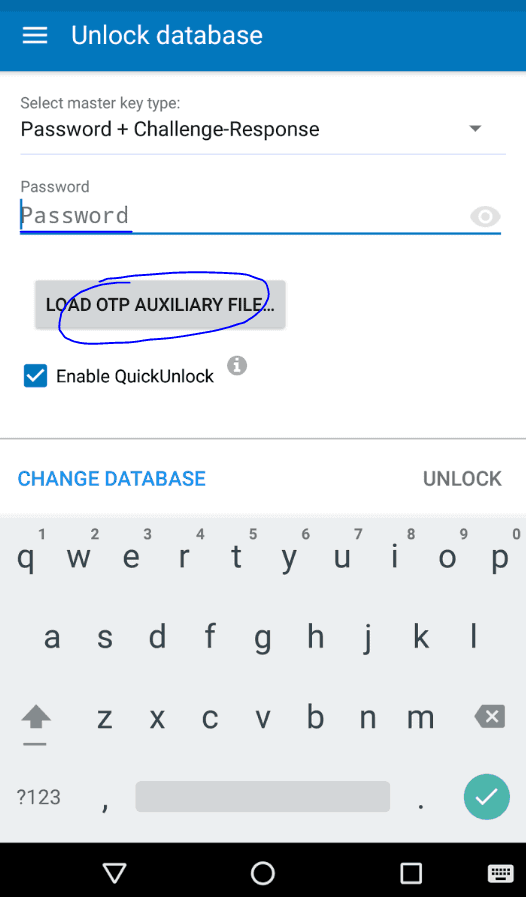
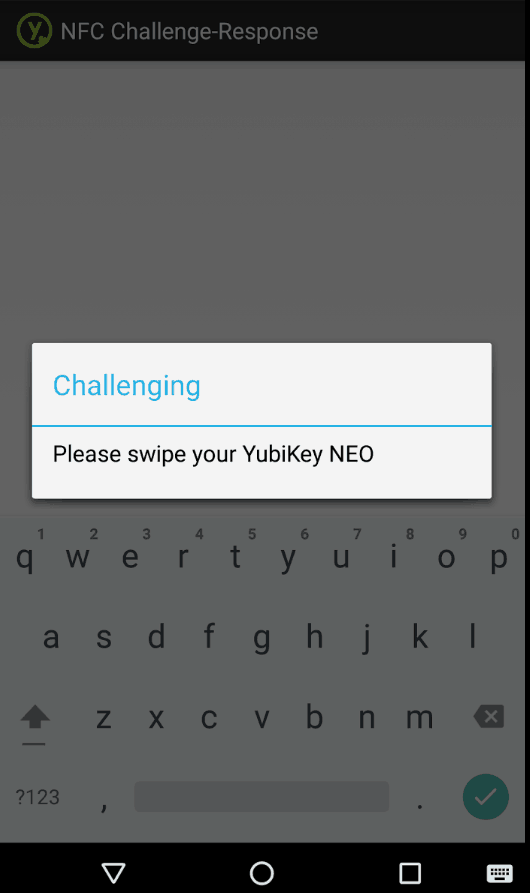
KeePass2Droid can use Challenge/Response encrypted databases if YubiKey’s YubiChallenge app is installed. Open KeePass2Droid, select “Password+Challenge-Response”, enter your master password and hit “Load OTP Auxiliary file…” which should open YubiChallenge. It may prompt for the auxiliary file the first time. If that happens choose the .xml file with the same name as the KeePass database.
Swipe your YubiKey to unlock the database.
LastPass
LastPass also supports Yubikey using OTP for the paid versions of LastPass. The YubiKey isn’t used as part of a master composite key to encrypt the password data as it does with Keepass, instead, it’s only used to authenticate against the service.
FIDO U2F Authentication
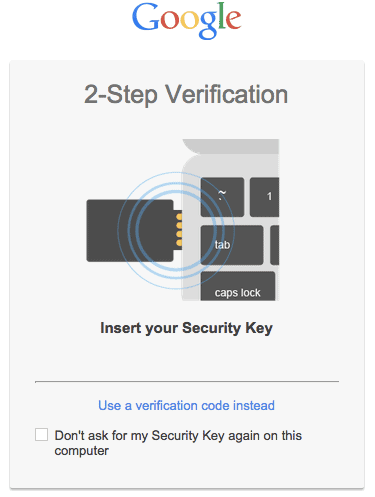
Some services like Google, GitHub, etc. are starting to support FIDO U2F (Universal 2 Factor) auth. The main disadvantage I’ve found to this method is you need a backup method for logging in if you lose the YubiKey since you can (with the services I’ve tried) only associate one YubiKey with an account using U2F. That said it is very simple to use… and some services let you use OTP, an Authenticator or SMS as a backup which I think is reasonable. Typically after providing a username/password the service will have you insert your YubiKey to authenticate the user.
Yubico Authenticator
OTP Auth codes can also be stored using the Yubico Authenticator for Android (just swipe the key near your phone’s NFC antenna to get your auth codes) or the Desktop Authenticator (Win, Mac, or Linux).
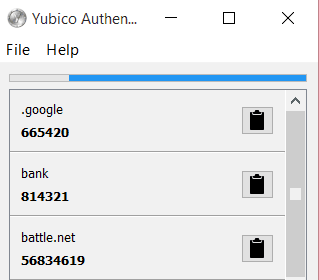
Yubico Authenticator works like the Google Authenticator, but the auth secrets are stored on the YubiKey instead of the Android device. I like this because it means if my Android is dead I can just use another Android phone, or run the desktop authenticator app on a computer and insert the YubiKey. Password protection is also available to secure the auth codes adding one more layer of security.
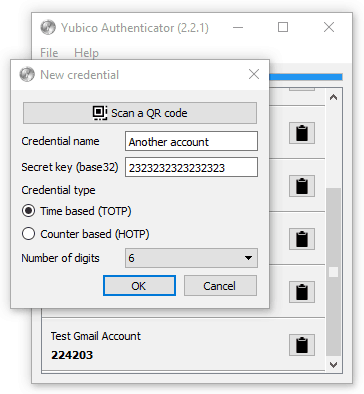
I was able to get YubiKey to work with pretty much any service that works with the Google Authenticator. And I was also able to program the secret into multiple YubiKeys.
YubiKey as a Battle.Net Authenticator
(Note that this is not supported by Battle.Net, use at your own risk).
I found a project called WinAuth and the latest BETA version is able to generate a virtual Battle.Net Authenticator.
Create the virtual authenticator…
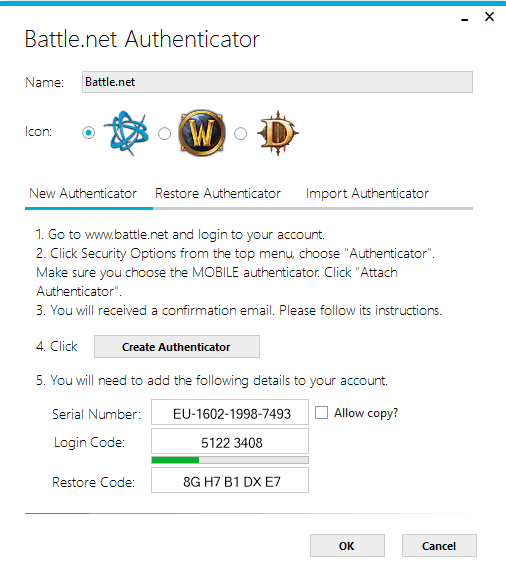
Export the WinAuth config to a text file…
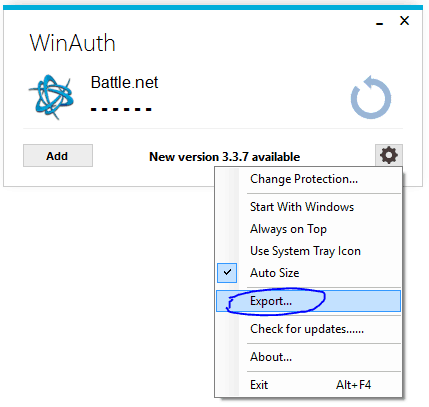
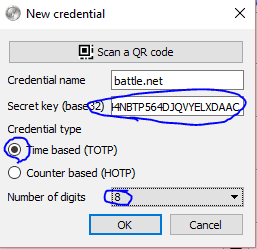
Copy the secret…

Add it to YubiKey and you’ve got a Battle.Net Authenticator! This should work with all the Blizzard games like StarCraft and WarCraft and whatever else they have these days. Register the device with Battle.net using the Serial number in WinAuth.
I also tried to emulate a Steam Guard Mobile Authenticator but it won’t work with YubiKey’s Authenticator out of the box–however, since the YubiKey Authenticator is open source I’m sure it would be fairly easy to implement for someone that has a bit of time on their hands.
And More…
I certainly haven’t explored everything that can be done with the device… it can store PGP keys and be used for SSH authentication, be used for PAM or AD authentication, etc. What I really like about Yubico is the devices are affordable, the company stands behind their product, the software is open-source (with pages of projects on GitHub) and works on Linux, Mac, Windows, and Android making it a great cross-platform solution. For people that use several different 2FA methods against a variety of services this single USB device will probably handle most, if not all of them.
Of course, 2FA isn’t going to make anyone immune to hackers, but it does add an additional layer of security on top of passwords.