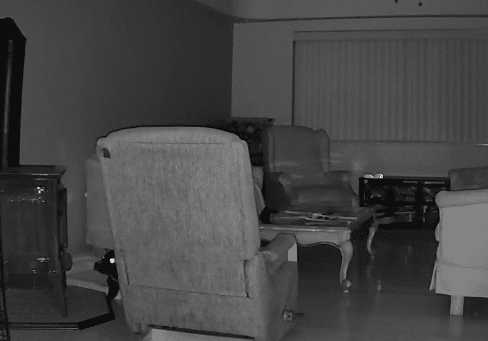
So, we got a puppy and wanted a way to keep an eye on him when we left the house to make sure he behaved. So I thought I’d try out UniFi Protect since we already have a UniFi Dream Machine Pro. The G3 Instant Camera is $30, has infrared night vision, two-way audio, and connects via WiFi, so I can plug it in when we leave or unplug it and stow it away when home (I don’t really want to be under video surveillance).
I have a number of 2TB HGST HDDs, so I thought I’d add one to the UDM Pro.
The procedure to add a drive to the UDMP is to power off, add the drive, power it back on, and the UDM Pro should automatically format it and make it available to UniFi Protect. Sounds easy.
This didn’t happen for me.
Symptoms:
Recording Capacity shows 0d 0h 0m. Zero capacity.
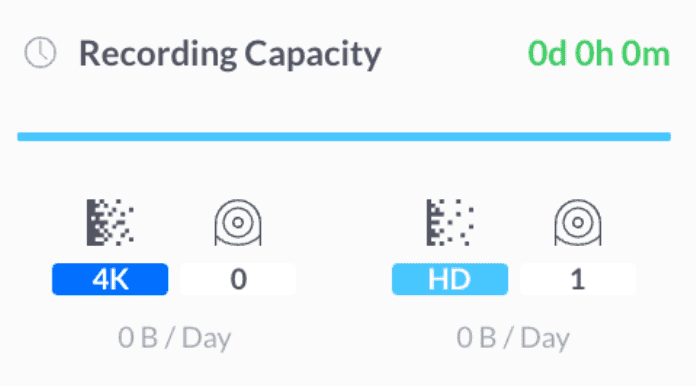
The Camera Settings show “Recording disabled”. There is no option to set the recording to “Always” or “Motion.”

The drive shows up as /dev/sda in the UDM Pro. Using ssh I deleted the partitions on /dev/sda, rebooted the UDM Pro around four times to no avail. It saw the drive, showed up in UniFi Protect, and even created a Linux partition. But the UDM Pro never created a filesystem or mounted the drive. Apparently deleting the partitions isn’t enough.
Fixing the Problem with Fdisk
Note that on my UDM SE the external drive showed up as /dev/sdb instead of /dev/sda. It’s a good idea to use the “p” command in fdisk and verify the drive size is what you’re expecting before moving further.
I suspect that this may be because I had pulled the drive from a ZFS system which may have had some special properties on the partition table. I SSHed into the UDM Pro and ran the following fdisk commands to create a new partition table (wiping the ZFS signature). Commands in bold.
# fdisk /dev/sda

Welcome to fdisk (util-linux 2.31.1).
Changes will remain in memory only, until you decide to write them.
Be careful before using the write command.


Command (m for help): p
Disk /dev/sda: 1.8 TiB, 2000398934016 bytes, 3907029168 sectors
Units: sectors of 1 * 512 = 512 bytes
Sector size (logical/physical): 512 bytes / 512 bytes
I/O size (minimum/optimal): 512 bytes / 512 bytes
Disklabel type: gpt
Disk identifier: 6AECF181-6CD3-904B-BED1-B5F7886D865E

Device     Start        End    Sectors  Size Type
/dev/sda1   2048 3907029134 3907027087  1.8T Linux filesystem

Command (m for help): m

Help:

  Generic
   d   delete a partition
   F   list free unpartitioned space
   l   list known partition types
   n   add a new partition
   p   print the partition table
   t   change a partition type
   v   verify the partition table
   i   print information about a partition

  Misc
   m   print this menu
   x   extra functionality (experts only)

  Script
   I   load disk layout from sfdisk script file
   O   dump disk layout to sfdisk script file

  Save & Exit
   w   write table to disk and exit
   q   quit without saving changes

  Create a new label
   g   create a new empty GPT partition table
   G   create a new empty SGI (IRIX) partition table
   o   create a new empty DOS partition table
   s   create a new empty Sun partition table


Command (m for help): d
Selected partition 1
Partition 1 has been deleted.

Command (m for help): o
Created a new DOS disklabel with disk identifier 0x6898bec1.
The old zfs_member signature will be removed by a write command.

Command (m for help): p

Disk /dev/sda: 1.8 TiB, 2000398934016 bytes, 3907029168 sectors
Units: sectors of 1 * 512 = 512 bytes
Sector size (logical/physical): 512 bytes / 512 bytes
I/O size (minimum/optimal): 512 bytes / 512 bytes
Disklabel type: dos
Disk identifier: 0x6898bec1

Command (m for help): w
The partition table has been altered.
Calling ioctl() to re-read partition table.
Syncing disks.

#
I restarted, and it immediately recognized the drive and was available in Protect.
Now, I can keep an eye on our puppy.
I just have to say THANKS… Very much… This has helped me since I been trying to add a new drive since Friday… I though I just had to add and the system would do everything… I would be going back and checking to see that status of the drive for over a day and nothing was working… No matter what I was doing…
Once again,
THANKS
You’re welcome, Jeffrey. Glad this helped somebody!
Brilliant – Exactly what I needed to sort out a 3TB I had lying around from an old ZFS array – All the other tricks I read did not work – This worked instantly after a reboot. Thanks for saving me time messing around!
Very good, glad it worked!
you say your disk showed up as /dev/sda. In my UDM pro /dev/sda shows up as the default internal storage. Are you saying you deleted the partitions on your internal storage, when through this process then it was able to see your added 2tb disk??
This is how i show:
You can see SDA disk is only 14 gig (internal) no where do I even show a mounted large drive.
NAME MAJ:MIN RM SIZE RO TYPE MOUNTPOINT
sda 8:0 1 14.7G 1 disk
|-sda1 8:1 1 64M 1 part
|-sda2 8:2 1 1G 1 part
|-sda3 8:3 1 1G 1 part
|-sda4 8:4 1 128M 0 part /mnt/persistent
|-sda5 8:5 1 32M 1 part
`-sda6 8:6 1 12.5G 0 part /root/.ssh/id_rsa
mtdblock0 31:0 0 1.8M 1 disk
mtdblock1 31:1 0 64K 1 disk
mtdblock2 31:2 0 64K 1 disk
mtdblock3 31:3 0 64K 1 disk
mtdblock4 31:4 0 64K 1 disk
zram0 254:0 0 6.8G 0 disk [SWAP]
No, don’t do that. That’ll mess up your UDM Pro. My external drive got sda and the internal is sdb. On yours, it looks like the large drive isn’t even being detected. Can you tell if it’s spinning up or do you have another drive to try? This is what mine looks like:
NAME MAJ:MIN RM SIZE RO TYPE MOUNTPOINT
sda 8:0 0 1.8T 0 disk
`-sda1 8:1 0 1.8T 0 part /mnt/data_ext
sdb 8:16 1 14.7G 1 disk
|-sdb1 8:17 1 64M 1 part
|-sdb2 8:18 1 1G 1 part
|-sdb3 8:19 1 1G 1 part /overlay/root_ro
|-sdb4 8:20 1 128M 0 part /mnt/persistent
|-sdb5 8:21 1 32M 1 part
`-sdb6 8:22 1 12.5G 0 part /mnt/data
mtdblock0 31:0 0 1.8M 1 disk
mtdblock1 31:1 0 64K 1 disk
mtdblock2 31:2 0 64K 1 disk
mtdblock3 31:3 0 64K 1 disk
mtdblock4 31:4 0 64K 1 disk
zram0 254:0 0 6.8G 0 disk [SWAP]
Appreciate this info! Latest update to Protect hosed up my system and even restoring from the backup didn’t fix things. Lost all my recordings and, perhaps worse, it thought the only recording space available on the drive is whatever tiny bit of free space was available, so it essentially wasn’t recording at all. Using this info got me back my drive space, if not my recordings (which weren’t important; it’s just the principal of the thing that makes me mad).
Only thing I would note is that I ended up using “g” rather than “o” to create the new label since my drive is >2 TB. The system helpfully provided this direction when I used “o” on my first attempt: “The size of this disk is 3.7 TiB (4000787030016 bytes). DOS partition table format cannot be used on drives for volumes larger than 2199023255040 bytes for 512-byte sectors. Use GUID partition table format (GPT).”
Thanks again!
You’re welcome, Brent. Glad you eventually got it back up. Also, thanks for the note on using GPT partitions with larger drives.
After updating recently my drive was constantly showing at 100% capacity and not recording anything new. I wanted to reset the drive since I didn’t need any old recordings and there’s really no information out there on how to do it from the UDM-Pro shell.
Except for this super helpful article!
In relation to Brent’s comment on using G instead of O for drives larger than 2TB, it shouldn’t actually matter. The UDM-Pro will reformat the drive to what it needs on reboot after this process is complete. I used O on a 4TB drive, got the same error but it creates the DOS partition anyway with a maxed out size of 2TB. This is then overwritten by the partitioning that the UDM-Pro needs on reboot so it’s irrelevant.
Thanks for the helpful article!
Hey your solution worked like a charm for me. I had issue with my UDM-PRO by trying to install a hard drive for my G4 Doorbell. I inserted the drive raw and it didn’t worked. I also inserted the drive with the ext4 filesystem and didn’t worked too. All doing that by shutting down and then installing the hdd and finally power it up.
Thanks !!!!
Thanks for this! Saved me a ton time.
you saved me here. thank you for this!
You’re welcome!